Probably the Best Little Roaster in the World
The Aillio Bullet R1 V2 is a unique roaster that spans the gap between personal and commercial use. With the Bullet, roast capacity ranges from 50-1000 grams (0.1-2.2lbs) at a time. Whether you’re a professional looking for a versatile sample roaster with extra capacity, or an amateur looking to take your coffee to the next level, the Bullet is a uniquely attractive option.
With technology that is unrivaled at any price point, there isn’t another 1kg capacity coffee roaster on the market that can do what it does. The Bullet offers better data, more precise control, and unparalleled ease-of-use — yet it is still one of the most affordable drum coffee roasters available anywhere. This roaster is the perfect machine to take your coffee roasting journey to the next level.
Easy to Use
The Aillio Bullet R1 V2 coffee roaster provides precise control over the entire roasting process, yielding great coffee in large and small batches. By giving you complete control over drum speed, fan speed, and power level, the Bullet provides consistent results across all roast levels.
The Aillio Bullet makes coffee roasting fun and easy while producing amazing coffee! Home roasters and professionals alike can choose to use the manual controls on the front screen or plug the roaster into a computer (compatible with Mac, Windows, and Linux) to use the proprietary Roastime software.

Photo Credit: Aillio
How the Aillio Bullet Works
Induction Heating
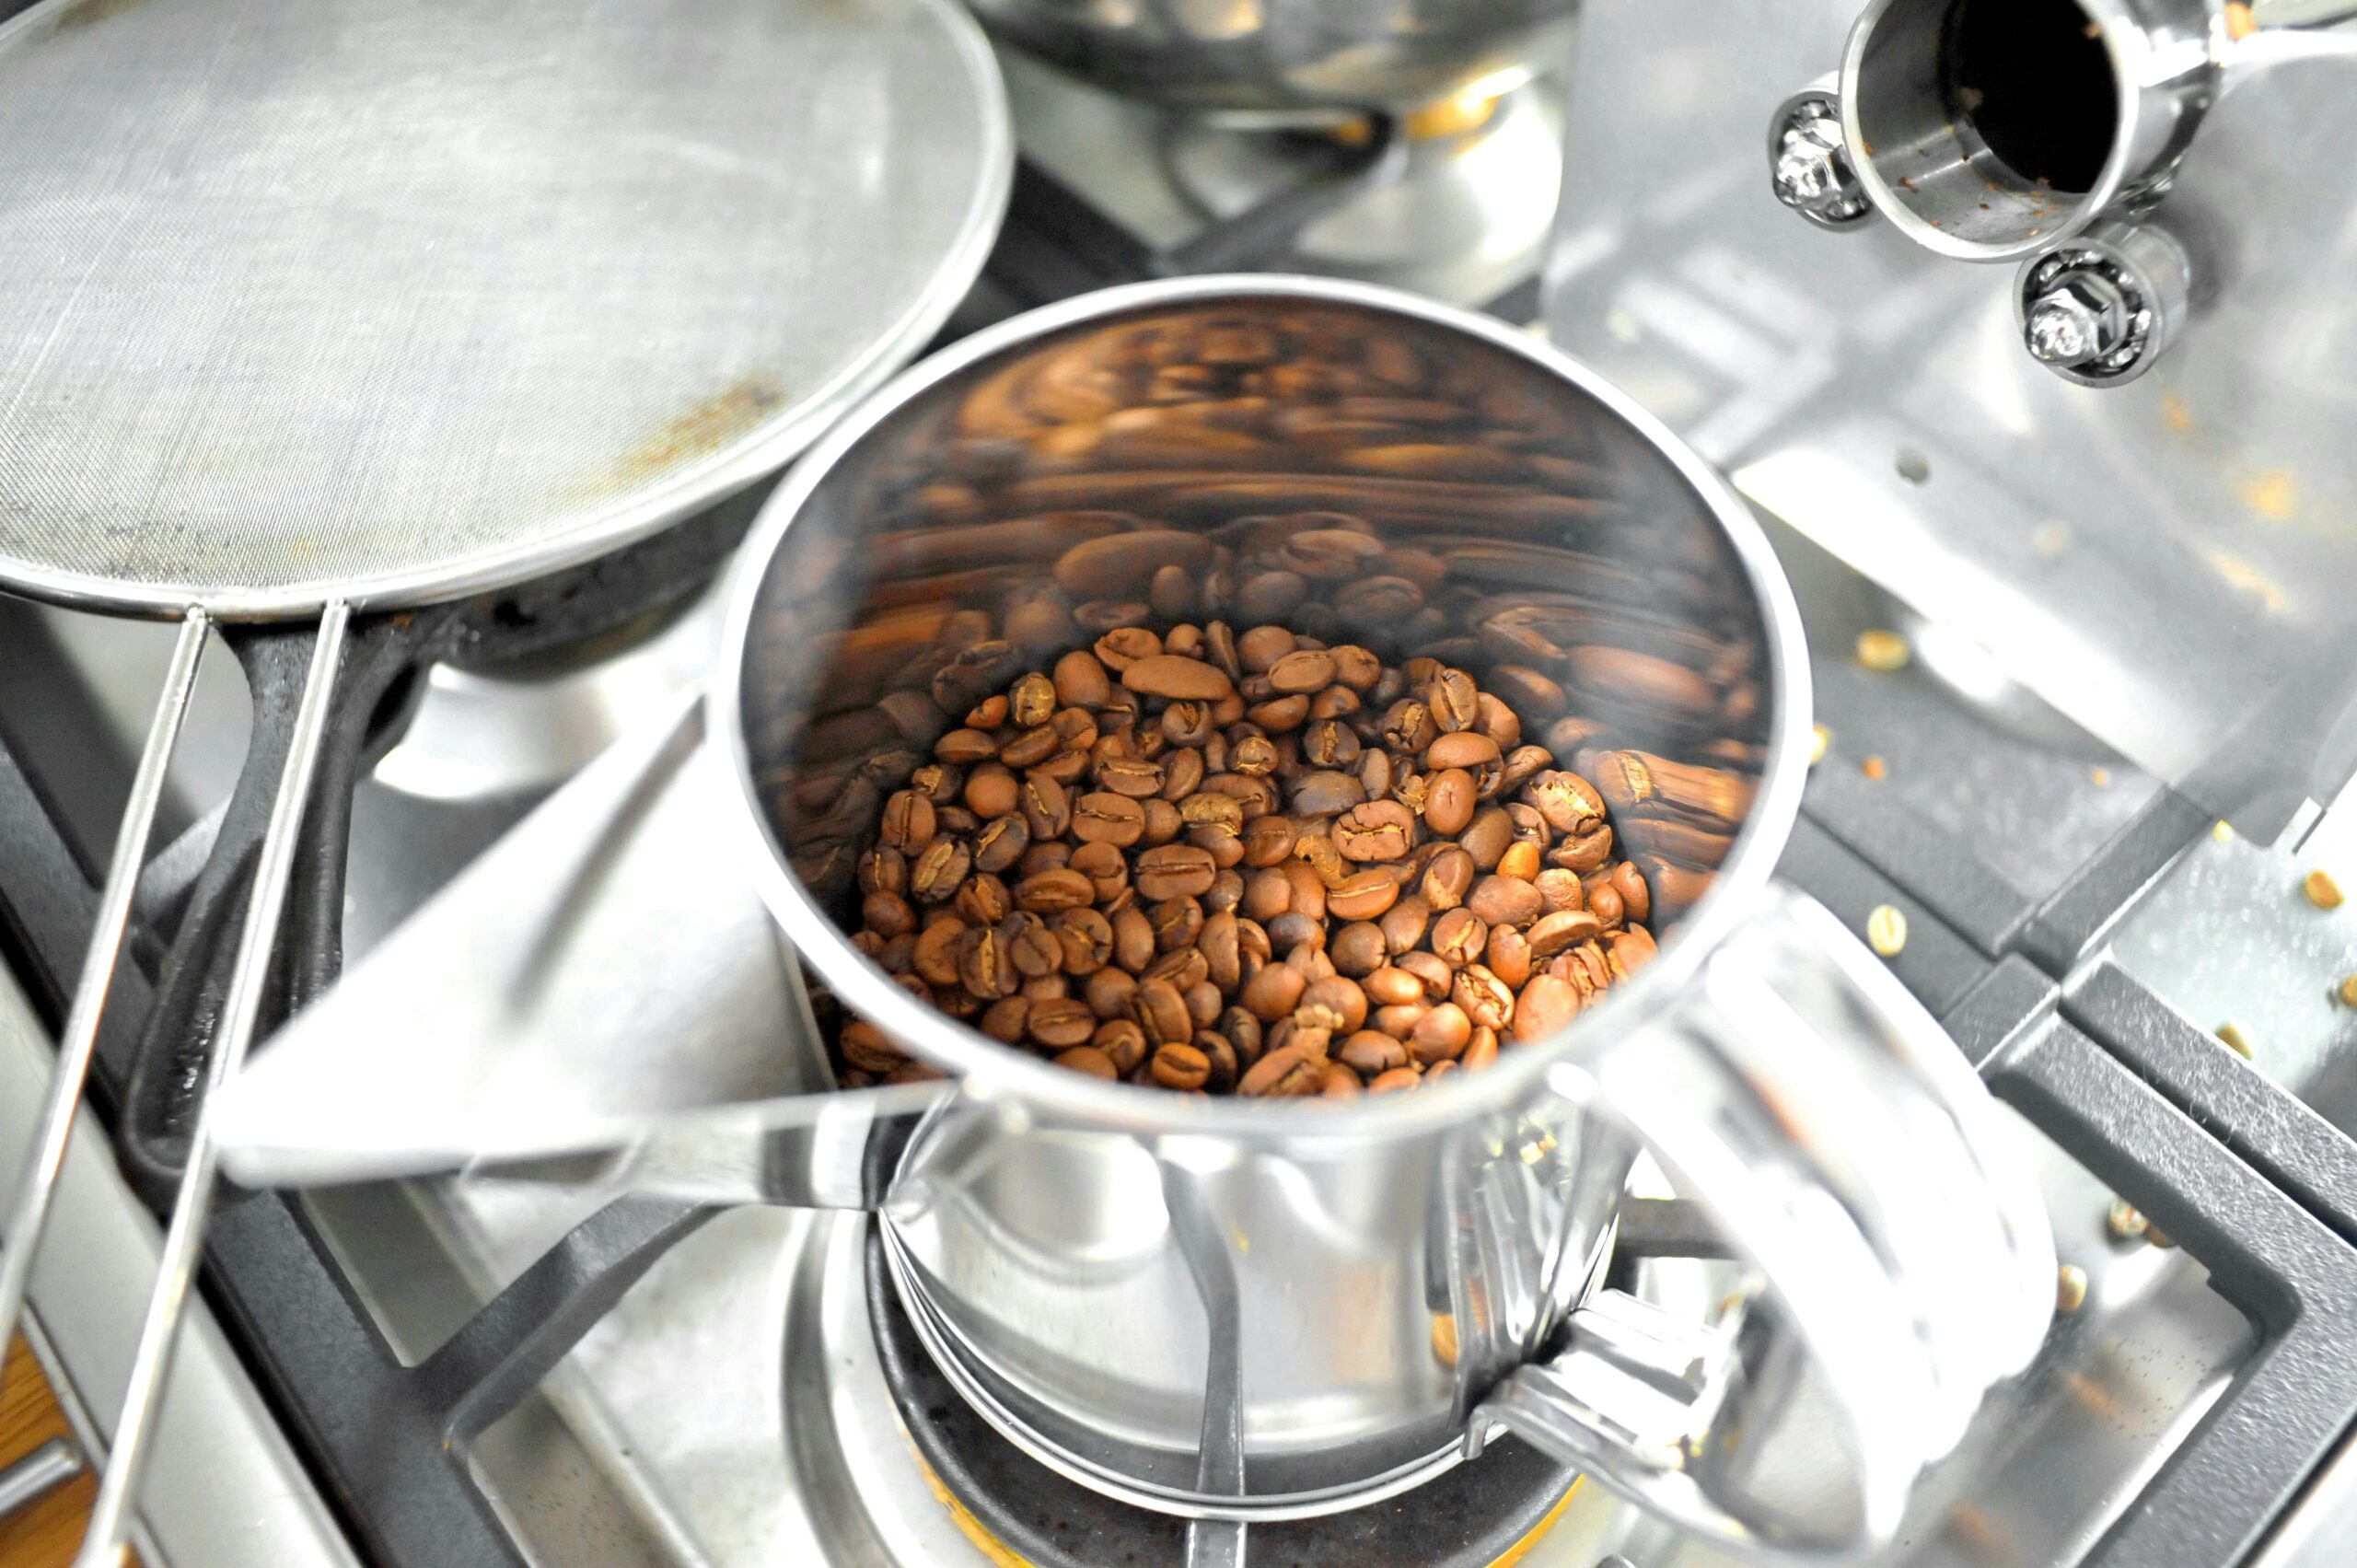
The Bullet is a complex roaster packed into a sleek, put-together housing. The Aillio Bullet R1 V2 uses innovative induction heating to heat its metal roasting drum. The induction heating works by pumping an electrical current through copper coils underneath the drum that creates an alternating electromagnetic field. This alternating electromagnetic field creates what are called “eddy currents” which in turn, meet resistance and heat up the metal drum. This highly responsive adjustable heat
All of these fancy terms essentially boil down to the fact that the Bullet coffee roaster is one of the most energy-efficient coffee roasters on the market. The induction heating system allows you to supply more power while using less energy. With 97% heating efficiency, the roaster consumes less than 75% of the energy of a similarly sized gas-powered roaster, making it easier on the environment and your wallet!

Photo Credit: Aillio
Airflow
The Aillio Bullet R1 V2’s unique air flow system begins by drawing in cold or room temperature air through its front inlet. That air is then heated underneath the drum. More cold or room temperature air is then drawn in through the back inlet where it mixes with the heated air from the front inlet. The different temperature air flows then mix in the drum. This mix of cool and hot air make it possible to control the roast temperature and roasting time with the fan speed alone. While doing so can be difficult and is not always recommended for beginners, it is a powerful tool for controlling bean temperature.

Photo Credit: Aillio
Infrared Bean Temperature Sensor (IBTS)
The IBTS is one of the major components of why the Aillio Bullet coffee roaster is such a unique and high-performing roaster. The infrared sensor helps resolve one of the issue of bad temperature data present in other coffee roasters. Traditionally, other roasters rely on the bean probe for temperature readings which can be very misleading since these probes are usually slower to react to bean temperature changes, inconsistent, and subject to change according to a variety of factors such as batch size.
The Aillio Bullet R1 V2 seeks to address these issues with the IBTS. By using infrared sensors that rapidly measure bean temperatures, this home roaster has revolutionized the quality and immediacy of data produced. Now roasters using the Bullet can get instant temperature readings throughout the entire bean mass, even when using different batch sizes and roasting to different profiles and temperatures. Accessing this instant temperature data allows for greater consistency between roasts.
This improvement in data quality is a good reason to get the Aillio Bullet in and of itself, but when added to the laundry list of other innovative new features such as induction heating, improved airflow, and an upgraded bean cooling tray, it makes purchasing the Bullet a no-brainer.
You can read more about the development of the IBTS on Aillio’s website here.

Photo Credit: Aillio
Roastime Software
Roastime, Aillio’s free proprietary roast profiling software provides a phenomenal resource to monitor and control your roasts. The software works in conjunction with the online RoastWorld platform. This combination of roasting software and online platform allows you to see other users roast profiles on the same coffee beans, user feedback, and roast recipes.
These recipes and profiles can then be downloaded to Roastime and overlayed to mimic or edit other roasters’ profiles. This ability to copy and adjust a pre-made roast profile or recipe is great for a more-beginner roaster who wants to learn from the wisdom of professional roasters while crafting their own roasting approach. After a few months roasting on the Aillio Bullet, you’ll be able to set the standard for other roasters seeking to copy your profiles!
As a bonus, almost all of our Current Crop coffees are already in the RoastWorld database, making it easier to add them to your inventory and find roast profiles from different people.

Photo Credit: Aillio
Roasting Coffee on an Aillio Bullet R1 V2
While every roaster has a different approach to roasting on the bullet, this step-by-step brief rundown adapted from Aillio’s “First Roast” guide, will give you a basic sense of what it takes to get great coffee while roasting on the Aillio Bullet R1 V2. In this example, we will be aiming for a light roast somewhere in the City-City+ range:
- Prepare your Bullet by making sure the chaff collector and drum are clean. Plug in the main power cord, bean cooling tray (small, circular plug on side), and USB light (USB port is under the main screen).
- [Optional] Download the free Roastime software and connect the bullet to your computer using a Micro USB cord (connects to the back of the built-in screen). This roast can also be completed manually by adjusting power, drum speed, and fan speed on the screen, but the software allows for greater use of the unique features offered by the Bullet R1 V2 such as the ability to save previous roasts, adding cup/flavor notes to each saved roast, downloading and adjusting other users’ roasts, etc.
- Preheat the machine to 428 Fahrenheit or 220 Celsius. Using the software, just go to “Active Roast” and set the temperature from the center dropdown bar. If using the manual option, simply adjust the preheat temperature with +/- buttons below the Heat/Cool display and press “PRS” once the optimal preheat temperature is reached. The bullet will respond by audibly saying “Preheating” from the built-in speaker. You can monitor the IBTS and Bean Temp (Probe) temperature on the software or on the bullet screen. The bullet will announce through the speaker once preheating is finished and you can “charge” (pour in coffee beans), usually after 25 minutes or once the Bean Temp (Probe) Rate of Rise (RoR) stabilizes.
- Once the roaster speaker or software alerts you that it is ready to “Charge” (pour in the coffee beans), simply remove the silicone bean shoot plug (located next to the screen) and place the bean hopper in the bean shoot hole (you may have to rotate the hopper a bit for it to be flush with the hole). Weigh out your batch of beans to 350 grams (about 12 ounces) and pour them into the hopper. The roaster should automatically recognize that beans have entered the machine and begin roasting (it should announce “Roasting” via the speaker). If, for any reason, the Bullet doesn’t automatically go into roasting mode, simply press the PRS button on the screen.
- Now that you’re officially roasting, set the the power (P) level to 7, fan (F) to 2, and drum speed (D) to 9 (you can toggle between fan/drum speed by using the “F2” button underneath the fan speed +/- button).
- When the IBTS reading reaches 120 Celsius or 250 Fahrenheit, adjust to P7 and F3 while maintaining the same drum speed. If you’ve decided to use the software, now is a great time to note the rapid shifts in the bean Rate of Rise (the rate at which the coffee bean temperature increases) on your live roast log (accessed through the “Active Roast” section). Over the course of your roast, the Rate of Rise should peak and then level out gradually.
- As the IBTS temperature rises to 165 Celsius or 330 Fahrenheit, bump the power down to 5. Around this time, you should begin to notice the coffee beginning its “yellowing” or caramelization stage. While the glass window displays the coffee color well when using the free USB light, you can also use the coffee trier (wooden handle) to pull out a few beans for inspection. (Pro-tip: Keep the trier upside down when not using it and simply flip it over when using it in order to avoid trapping partially-roasted beans in there). If you’re roasting on the software, you can go ahead and mark this yellowing stage on your roast log. This will help provide greater detail on the different stages of your coffee roasts.
- Once the IBTS temperature reaches 190 Celsius or 375 Fahrenheit, go ahead and bump the power down to 4.
- When you reach an even 200 Celsius or 390 Fahrenheit turn the fan up to 4 as well. By turning down the power and turning up the fan , the bean’s Rate of Rise will decrease. This is important so as not to roast your coffee too quickly.
- Somewhere in the next few seconds you should begin hearing a slight popping noise. This is called the first crack. If you’re reading this after buying an Aillio Bullet, then you probably already know what first crack is. Either way, if you’re using Roastime, you can go ahead and mark the beginning of first crack on your roast log. This will automatically begin calculating the “development” stage time, which plays a critical role in roast profile (more on this in future posts).
- Once the coffee has reached first crack, you can now decide how dark you want the beans to be. Since we’re aiming for a lighter roast (City-City+) in this example, we can “drop” (stop roasting) the beans somewhere between 45-90 seconds after first crack begins. When you’re ready to drop the coffee beans, hit the PRS button to begin the cooling process and lift the glass window with the black handle to allow the coffee to fall into the bean cooler aka cooling tray. (Pro-tip: A few beans may try to jump outside the cooling tray when dropping, we fix this but holding up roasting trays or books as bumpers). The cooling tray includes a powerful fan in the back that will help rapidly cool the coffee, but it’s also important to stir the beans for them to cool quicker (especially in larger batches).
- Congratulations, you did it! You now have top-notch, fresh roasted coffee! At this point, many users will weigh out their roasted coffee in order to calculate the total weight loss of the batch. While not necessary, weight loss can help you determine the roast level of your beans. The pre and post roast weights can be recorded in Roastime alongside other post-roast notes like rating, room humidity, ambient temperature, etc. The ability to save these notes in Roastime can come into hand over the course of your coffee roasting journey as it improves consistency and quality between each roast.